
Here's the look:

If you like this look then be sure to read on for the tutorial! Also, make sure you like my Facebook page. If you already have, then tell your friends to like it instead!
***Please pay no mind to my eyebrows, I'm growing them out.
...again.
- Step 1: After priming your eyes, take a matte white eyeshadow and apply it to the inner two-thirds of your lid.

- Step 2: Take the second color and apply it to the outer third of your lid and blend it with the white where they meet. For this look, any turquoise color will suffice. If you want to know the exact products I used for this look, I always list them at the bottom of my post.
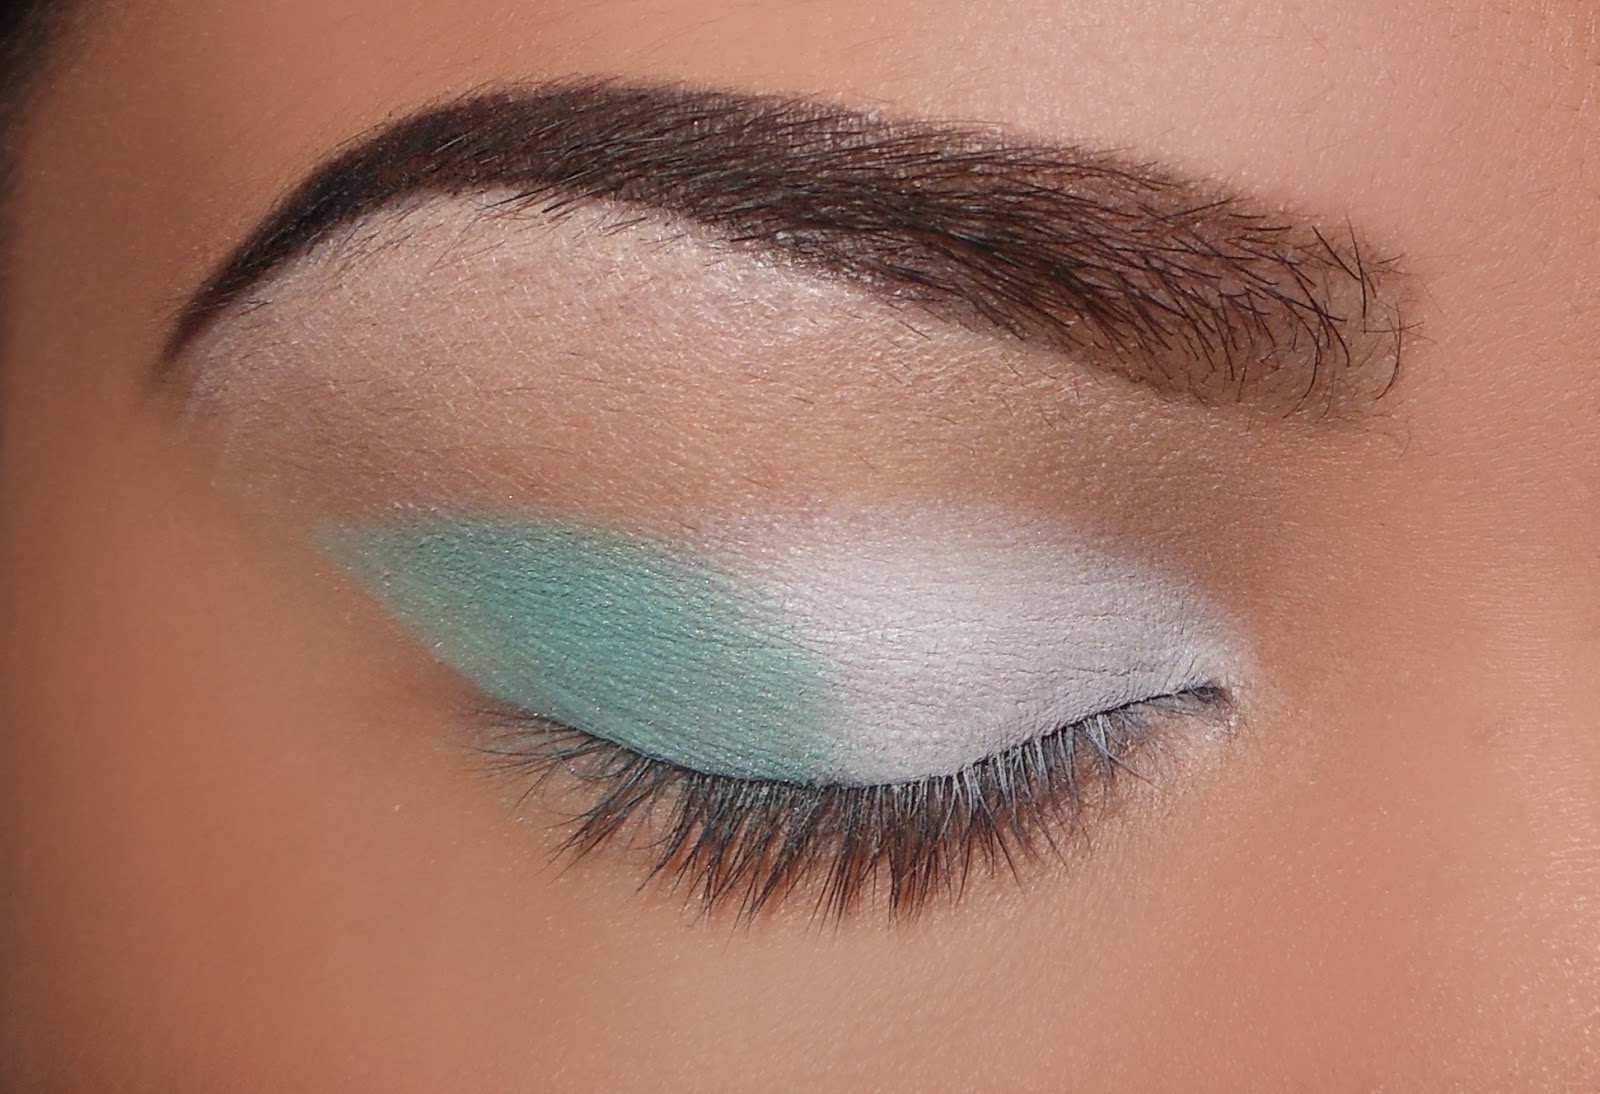
- Step 3: Next, take that same turquoise color and apply it to the crease, above the two eyeshadows you just applied.

- Step 4: Take a light, shimmer eyeshadow to use as a highlight and apply it right underneath your brow. Blend it down into the turquoise eyeshadow to get rid of any harsh lines.

- Step 5: Apply eyeliner above the lash line and wing it out.

- Step 6: Apply a metallic or shimmer blue eyeshadow on top of the black eyeliner. I only put it on the middle of the liner because I didn't want the whole thing to be blue.

- Step 7: Here I just took a small piece of lace and put it over my eye, then with a fluffy brush I applied purple eyeshadow so it would have this messy, splotchy look. You can just dab on purple shadow here and there, it's okay if it's not perfect. It just gives a nice background effect to the cheetah print. Keep the purple on the outer half of the eye.

- Step 8: Using liquid eyeliner, start to draw your cheetah spots. You can look up a picture for reference if you need it. I just did little parenthesis and circles in all different sizes.

Then you should get something like this:

- Step 9: Apply eyeshadow along the bottom lash line and wing it out next to the top winged liner. I used a purple and blue eyeshadow to achieve this color. Next, put a highlight color on the inner corner of your eyes, add your mascara and you're all done!

The finished look:


I hope you all enjoyed this picture tutorial. Leave a comment and let me know what you think!
Have any makeup looks you'd like me to show you? Just let me know!
Like my Facebook page: https://www.facebook.com/easternluggagemakeup

Ciao!
Eyes:
- Too Faced Shadow Insurance eye primer
- Sugarpill Cosmetics pressed eyeshadow "Tako"
- Sugarpill Cosmetics pressed eyeshadow "Mochi"
- Sugarpill Cosmetics pressed eyeshadow "2am"
- Too Faced eyeshadow "Cop A Teal"
- Too Faced eyeshadow "Marshmallow"
- Swagger Cosmetics pigment "Rad Bitch"
- Urban Decay 24/7 glide on pencil "Ransom"
- Palladio liquid eyeliner "Black"
- Femme Couture XXL Monster Lash mega volume mascara
Cheeks:
- NYX blush "Mocha"
Lips:
- NYX pump it up lip plumper "Scarlett"
Face:
- Make Up For Ever 5 camouflage cream palette "No. 1"
- Make Up For Ever Mat Velvet+ mutinying foundation "No. 45 - Soft Beige"
- Too Faced "Exclusive Bronzer" from Sweet Indulgence palette
Brows:
- Bitch Slap! Cosmetics brow quad "Dark"
No comments:
Post a Comment